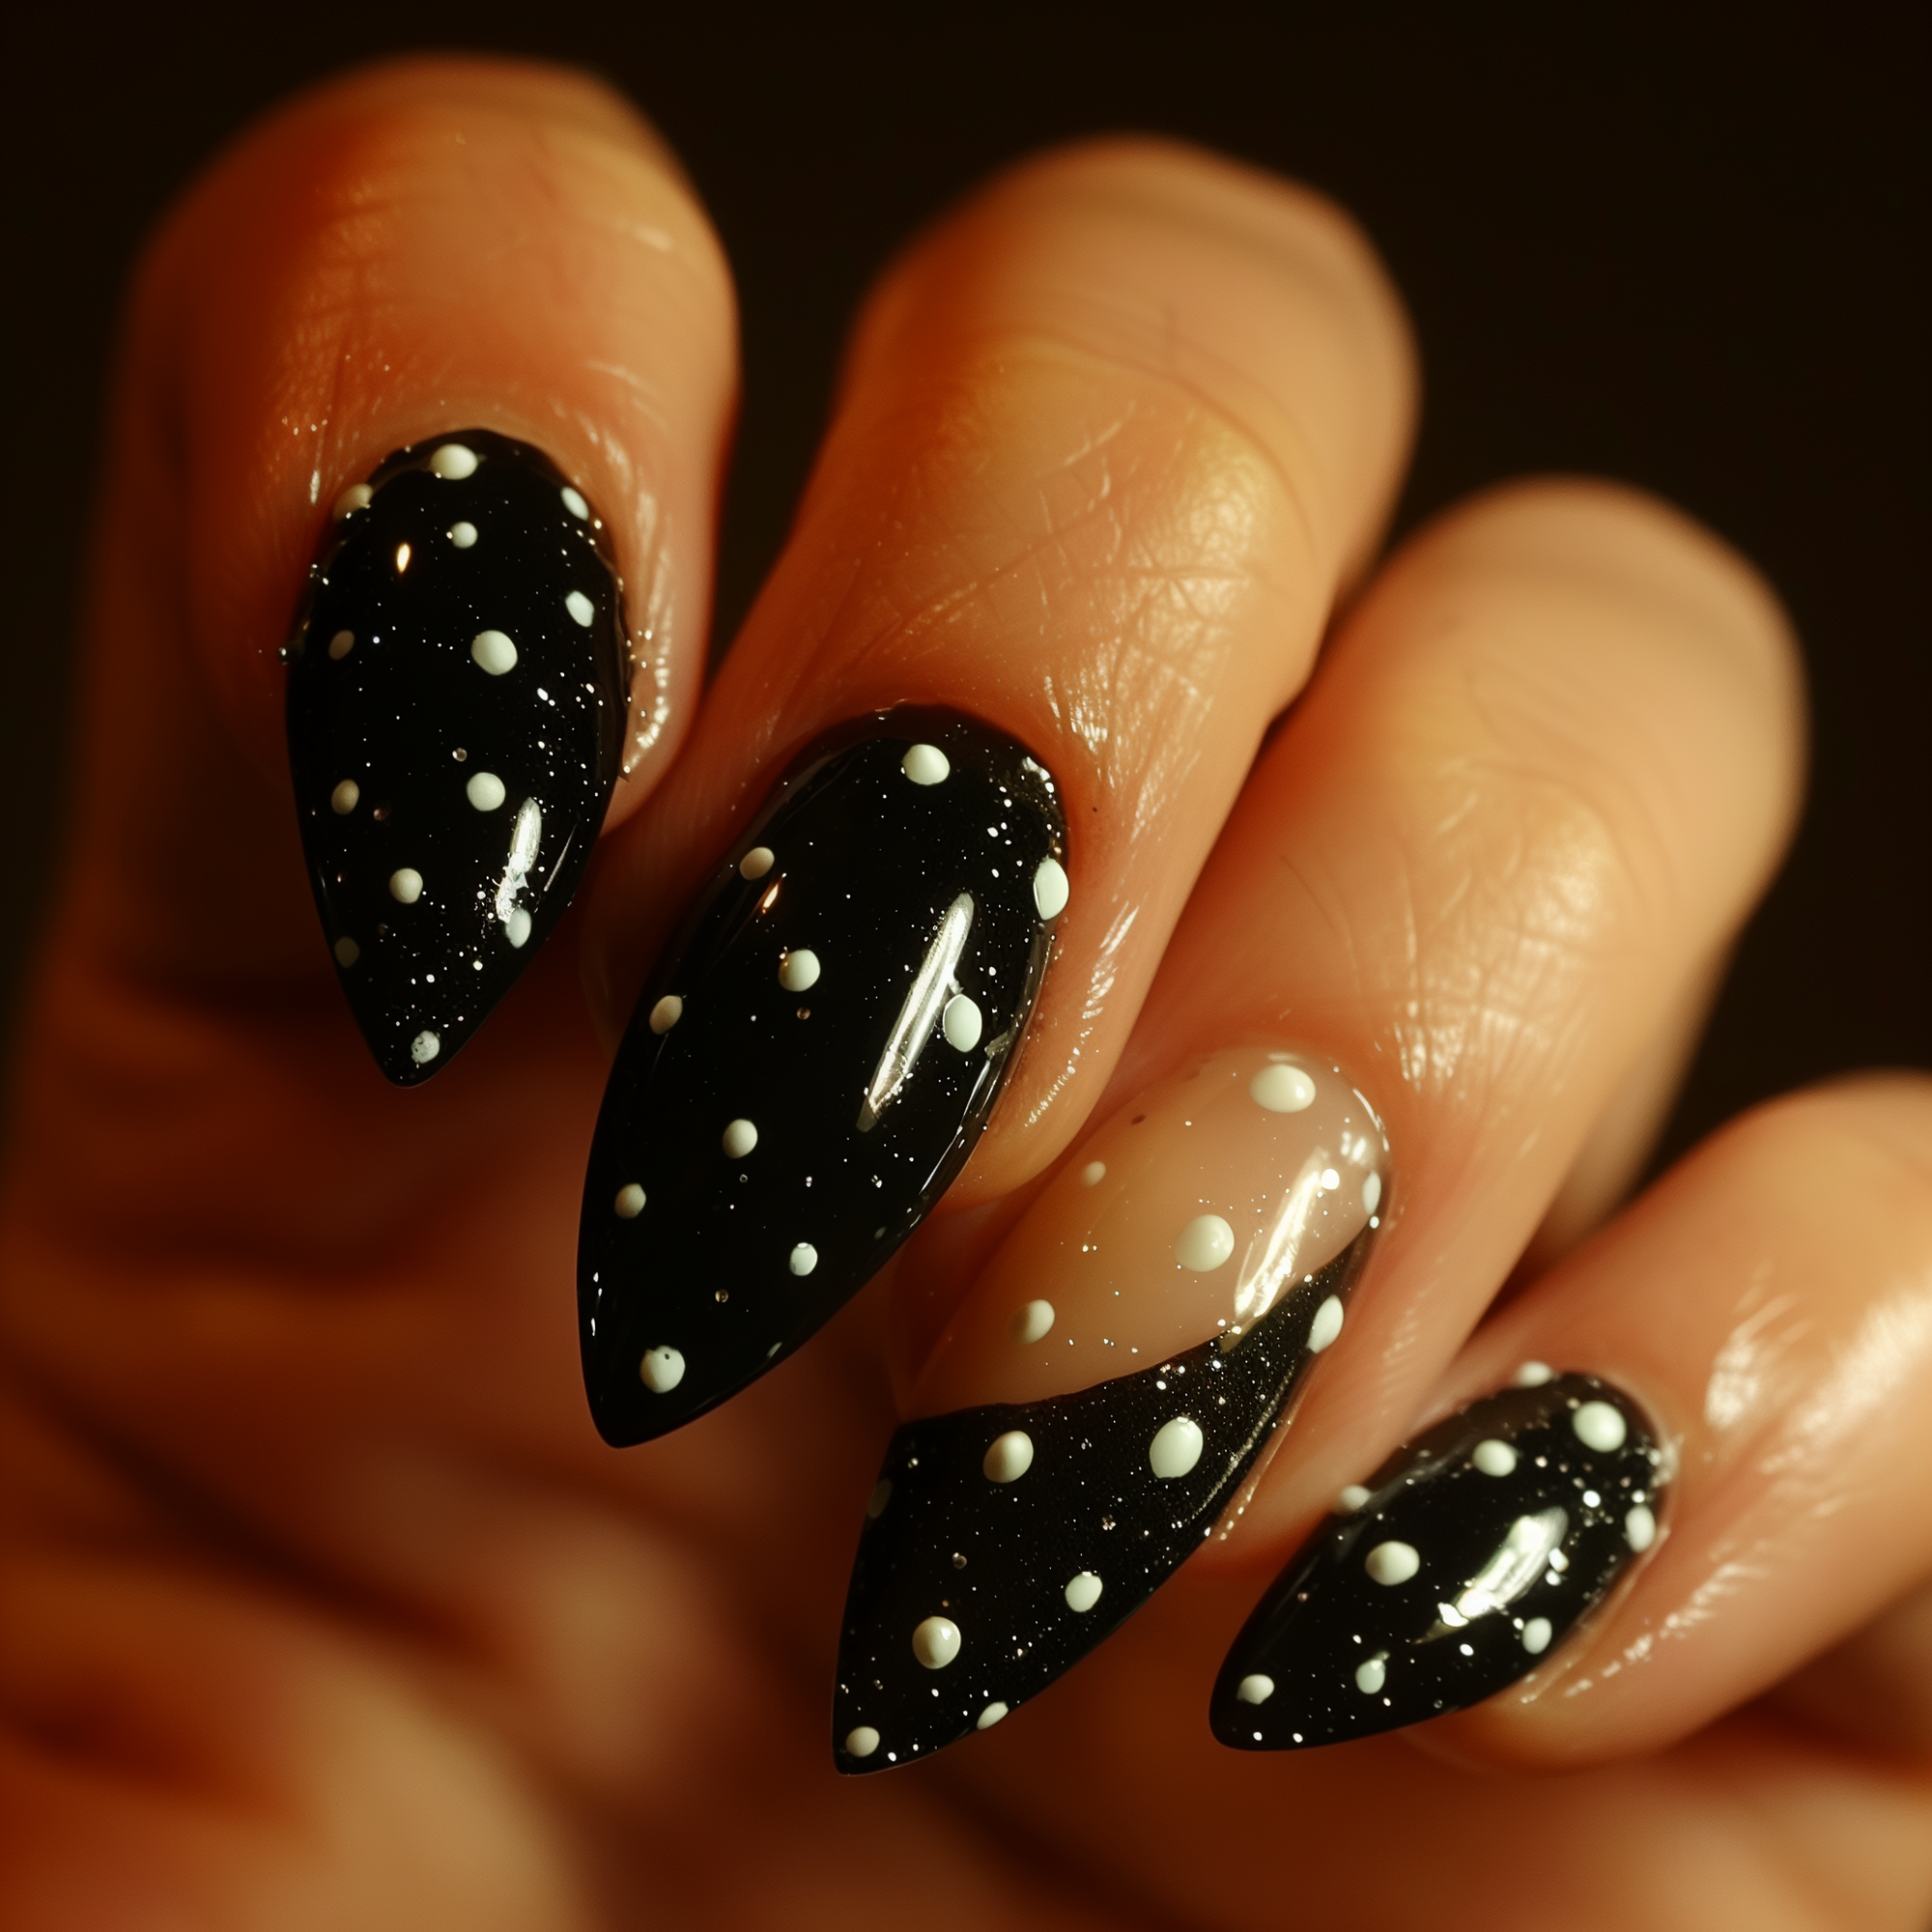
1. Polka Dots
- Tools Needed: Dotting tool or the end of a bobby pin.
-
Instructions:
- Paint your nails with a base color and let it dry completely.
- Dip the dotting tool or bobby pin into a contrasting nail polish color.
- Gently press the tool onto your nails to create dots. Repeat as needed.
- Finish with a top coat to seal and protect the design.

2. French Tips
- Tools Needed: White nail polish, nail guides (optional).
-
Instructions:
- Apply a clear base coat and let it dry.
- Use nail guides or freehand paint the tips of your nails with white polish.
- Once dry, apply a sheer pink or nude polish over the entire nail.
- Finish with a top coat.

3. Striped Nails
- Tools Needed: Striping tape or thin nail art brush.
-
Instructions:
- Paint your nails with a base color and let it dry completely.
- Apply striping tape where you want the stripes, ensuring it's firmly pressed down.
- Paint over the tape with a contrasting color.
- Remove the tape carefully while the polish is still wet.
- Finish with a top coat.
![]()
4. Accent Nail
-
Instructions:
- Paint all your nails with one color and let them dry.
- Choose a different color and paint your ring finger nail.
- Finish with a top coat on all nails.
5. Glitter Gradient
- Tools Needed: Glitter nail polish.
-
Instructions:
- Paint your nails with a base color and let it dry.
- Apply glitter polish to the tips of your nails.
- Use the brush to drag the glitter polish down towards the middle of the nail for a gradient effect.
- Finish with a top coat.

6. Ombre Nails
- Tools Needed: Makeup sponge, two nail polish colors.
-
Instructions:
- Paint your nails with a base color and let it dry.
- On a makeup sponge, apply two stripes of polish next to each other.
- Dab the sponge onto your nails, blending the colors together.
- Repeat until you achieve the desired gradient effect.
- Clean up the edges with a brush dipped in nail polish remover.
- Finish with a top coat.
7. Half-Moon Manicure
- Tools Needed: Reinforcement stickers or freehand.
-
Instructions:
- Apply a base color and let it dry completely.
- Place reinforcement stickers at the base of your nails.
- Paint over the entire nail with a contrasting color.
- Remove the stickers while the polish is still wet.
- Finish with a top coat.
8. Negative Space
- Tools Needed: Nail tape or freehand.
-
Instructions:
- Use tape to cover the parts of the nail you want to leave unpainted.
- Apply your chosen nail polish color.
- Remove the tape carefully while the polish is still wet.
- Finish with a top coat.
9. Floral Nails
- Tools Needed: Small nail art brush or dotting tool.
-
Instructions:
- Paint your nails with a base color and let it dry.
- Use a dotting tool or small brush to create a central dot for each flower.
- Add five small dots around the central dot to form petals.
- Repeat for as many flowers as desired.
- Finish with a top coat.
10. Geometric Patterns
- Tools Needed: Nail tape or thin nail art brush.
-
Instructions:
- Paint your nails with a base color and let it dry.
- Use tape to create geometric shapes (triangles, squares).
- Paint over the tape with a contrasting color.
- Remove the tape while the polish is still wet.
- Finish with a top coat.

11. Marble Effect
- Tools Needed: Toothpick, two or more nail polish colors.
-
Instructions:
- Paint your nails with a base color and let it dry.
- Apply a drop of each color onto the nail.
- Use a toothpick to swirl the colors together gently.
- Let the design dry and finish with a top coat.
12. Dotted Flower
- Tools Needed: Dotting tool or bobby pin.
-
Instructions:
- Paint your nails with a base color and let it dry.
- Use a dotting tool to create a central dot for each flower.
- Add five dots around the central dot to form petals.
- Finish with a top coat.
13. Chevron Pattern
- Tools Needed: Nail tape or chevron stickers.
-
Instructions:
- Paint your nails with a base color and let it dry.
- Apply chevron stickers or tape to create a zigzag pattern.
- Paint over the tape with a contrasting color.
- Remove the tape while the polish is still wet.
- Finish with a top coat.
![]()
14. Matte Finish
- Tools Needed: Matte top coat.
-
Instructions:
- Paint your nails with any color of your choice and let it dry.
- Apply a matte top coat over the entire nail.
- Allow the matte top coat to dry completely.
15. Animal Print
- Tools Needed: Thin nail art brush or dotting tool.
-
Instructions:
- Paint your nails with a base color and let it dry.
- Use a thin brush or dotting tool to create small spots or stripes.
- For leopard print, create irregular shapes with black polish.
- For zebra print, paint thin black stripes.
- Finish with a top coat.
16. Rainbow Nails
-
Instructions:
- Choose five different colors for each nail of one hand.
- Paint each nail a different color to create a rainbow effect.
- Finish with a top coat.
17. Newspaper Print
- Tools Needed: Newspaper, rubbing alcohol.
-
Instructions:
- Paint your nails with a light base color and let it dry.
- Dip a small piece of newspaper in rubbing alcohol.
- Press the newspaper onto your nail and hold for a few seconds.
- Gently peel off the newspaper to reveal the print.
- Finish with a top coat.

18. Gold Foil
- Tools Needed: Gold foil, foil glue or clear polish.
-
Instructions:
- Apply a base color and let it dry.
- Apply foil glue or clear polish where you want the foil to stick.
- Press gold foil onto the nail.
- Gently rub the foil to adhere it.
- Finish with a top coat.

19. Color Block
- Tools Needed: Nail tape.
-
Instructions:
- Paint your nails with a base color and let it dry.
- Use tape to section off parts of your nail.
- Paint each section with different colors.
- Remove the tape carefully while the polish is still wet.
- Finish with a top coat.
We hope you enjoyed this journey into the world of beginner-friendly nail designs. As you can see, creating beautiful nail art doesn't have to be complicated or time-consuming. With a bit of practice and creativity, you can achieve stunning results right at home. Remember, the key to mastering any nail design is to have fun and experiment with different styles and techniques.
Don't forget to share your nail art creations with us and let us know which designs you loved the most. Stay tuned for more nail art tips, trends, and tutorials. Happy painting, and may your nails always be a canvas for your creativity!